


Deploying KubeDB Platform in OpenShift Cluster
This guide describes how to deploy the KubeDB Platform on a Red Hat OpenShift cluster. The deployment types available to you depend on how you want to reach the platform:
- IP mode — choose this when you want to access the platform over a static IP. Available deployment types: Cloud Demo and Onprem Demo.
- DNS mode — choose this when you want to access the platform over a DNS name. Available deployment types: Onprem Demo and Self Hosted Production.
Regardless of the mode, an OpenShift deployment always requires you to toggle the Install on Red Hat OpenShift cluster? option and provide the Kube API Server endpoint.
Prerequisites
See Prerequisites in the Common Configuration guide for the minimum cluster requirements and the optional k3s setup note.
1. Visit the KubeDB Platform Self-Hosted Page
Navigate to KubeDB Platform Self-Hosted. Here you will find your previously generated self-hosted installers.
Click on the Create New Installer button to get started.
2. Enable OpenShift and Set the Kube API Server
This is the common requirement for every OpenShift deployment, irrespective of the mode you chose above.
- Toggle on the Install on Red Hat OpenShift cluster? option.
- Set the Kube API Server field with your cluster’s API server endpoint.
Run the following command against your OpenShift cluster to fetch the API server endpoint:
oc whoami --show-server
You can also read it from your current kubeconfig context:
kubectl config view --minify -o jsonpath='{.clusters[0].cluster.server}'
Paste the returned URL (for example, https://api.<cluster-name>.<base-domain>:6443) into the Kube API Server field.
3. Choose the Deployment Mode
Pick the Deployment Type based on how you want to access the platform, and give it a name in the installer name section. The specifics for each mode are below.
IP mode (IP preferred)
Use this mode when you want to reach the platform through a static IP instead of a DNS name. In this mode you can choose either Cloud Demo or Onprem Demo as the deployment type.
- DNS & Connectivity:
- Enable DNS: Leave this toggle off since access is over an IP.
- Target IP: At this point the load balancer does not exist yet, so just provide any random IP to proceed with creating the installer.
[!IMPORTANT] The LoadBalancer IP is not known yet, so the random Target IP must be fixed later (see Deploy KubeDB Platform).
Once OpenShift is enabled and the Kube API Server is set, follow the standard configuration sections for the deployment type you picked. See the Cloud Demo or Onprem Demo guide for the full walkthrough of these sections.
DNS mode (DNS preferred)
Use this mode when you want to reach the platform through a DNS name. In this mode you can choose either Onprem Demo or Self Hosted Production as the deployment type, the latter being the recommended setup for production.
- DNS & Connectivity:
- Enable DNS: Toggle this on so the installer can manage or integrate with your DNS provider.
- Target IP: At this point the load balancer does not exist yet, so just provide any random IP to proceed with creating the installer.
[!IMPORTANT] The LoadBalancer IP is not known yet, so the random Target IP and the DNS
Arecord must be fixed later (see Deploy KubeDB Platform).
Once OpenShift is enabled and the Kube API Server is set, follow the standard configuration sections for the deployment type you picked. See the Onprem Demo or Self Hosted Production guide for the full walkthrough of these sections.
[!NOTE] This guide only covers the fields that are specific to an OpenShift deployment. Each deployment type has many more configuration sections (Global Administrative Settings, Registry, Monitoring, TLS, Ingress & Gateway, NATS, and more). For the complete field-by-field walkthrough, follow the guide for the deployment type you choose:
4. Generate Installer and Documentation
Click the “Deploy” button to submit your information. AppsCode will generate the installer and provide the necessary documentation.
5. Deploy KubeDB Platform
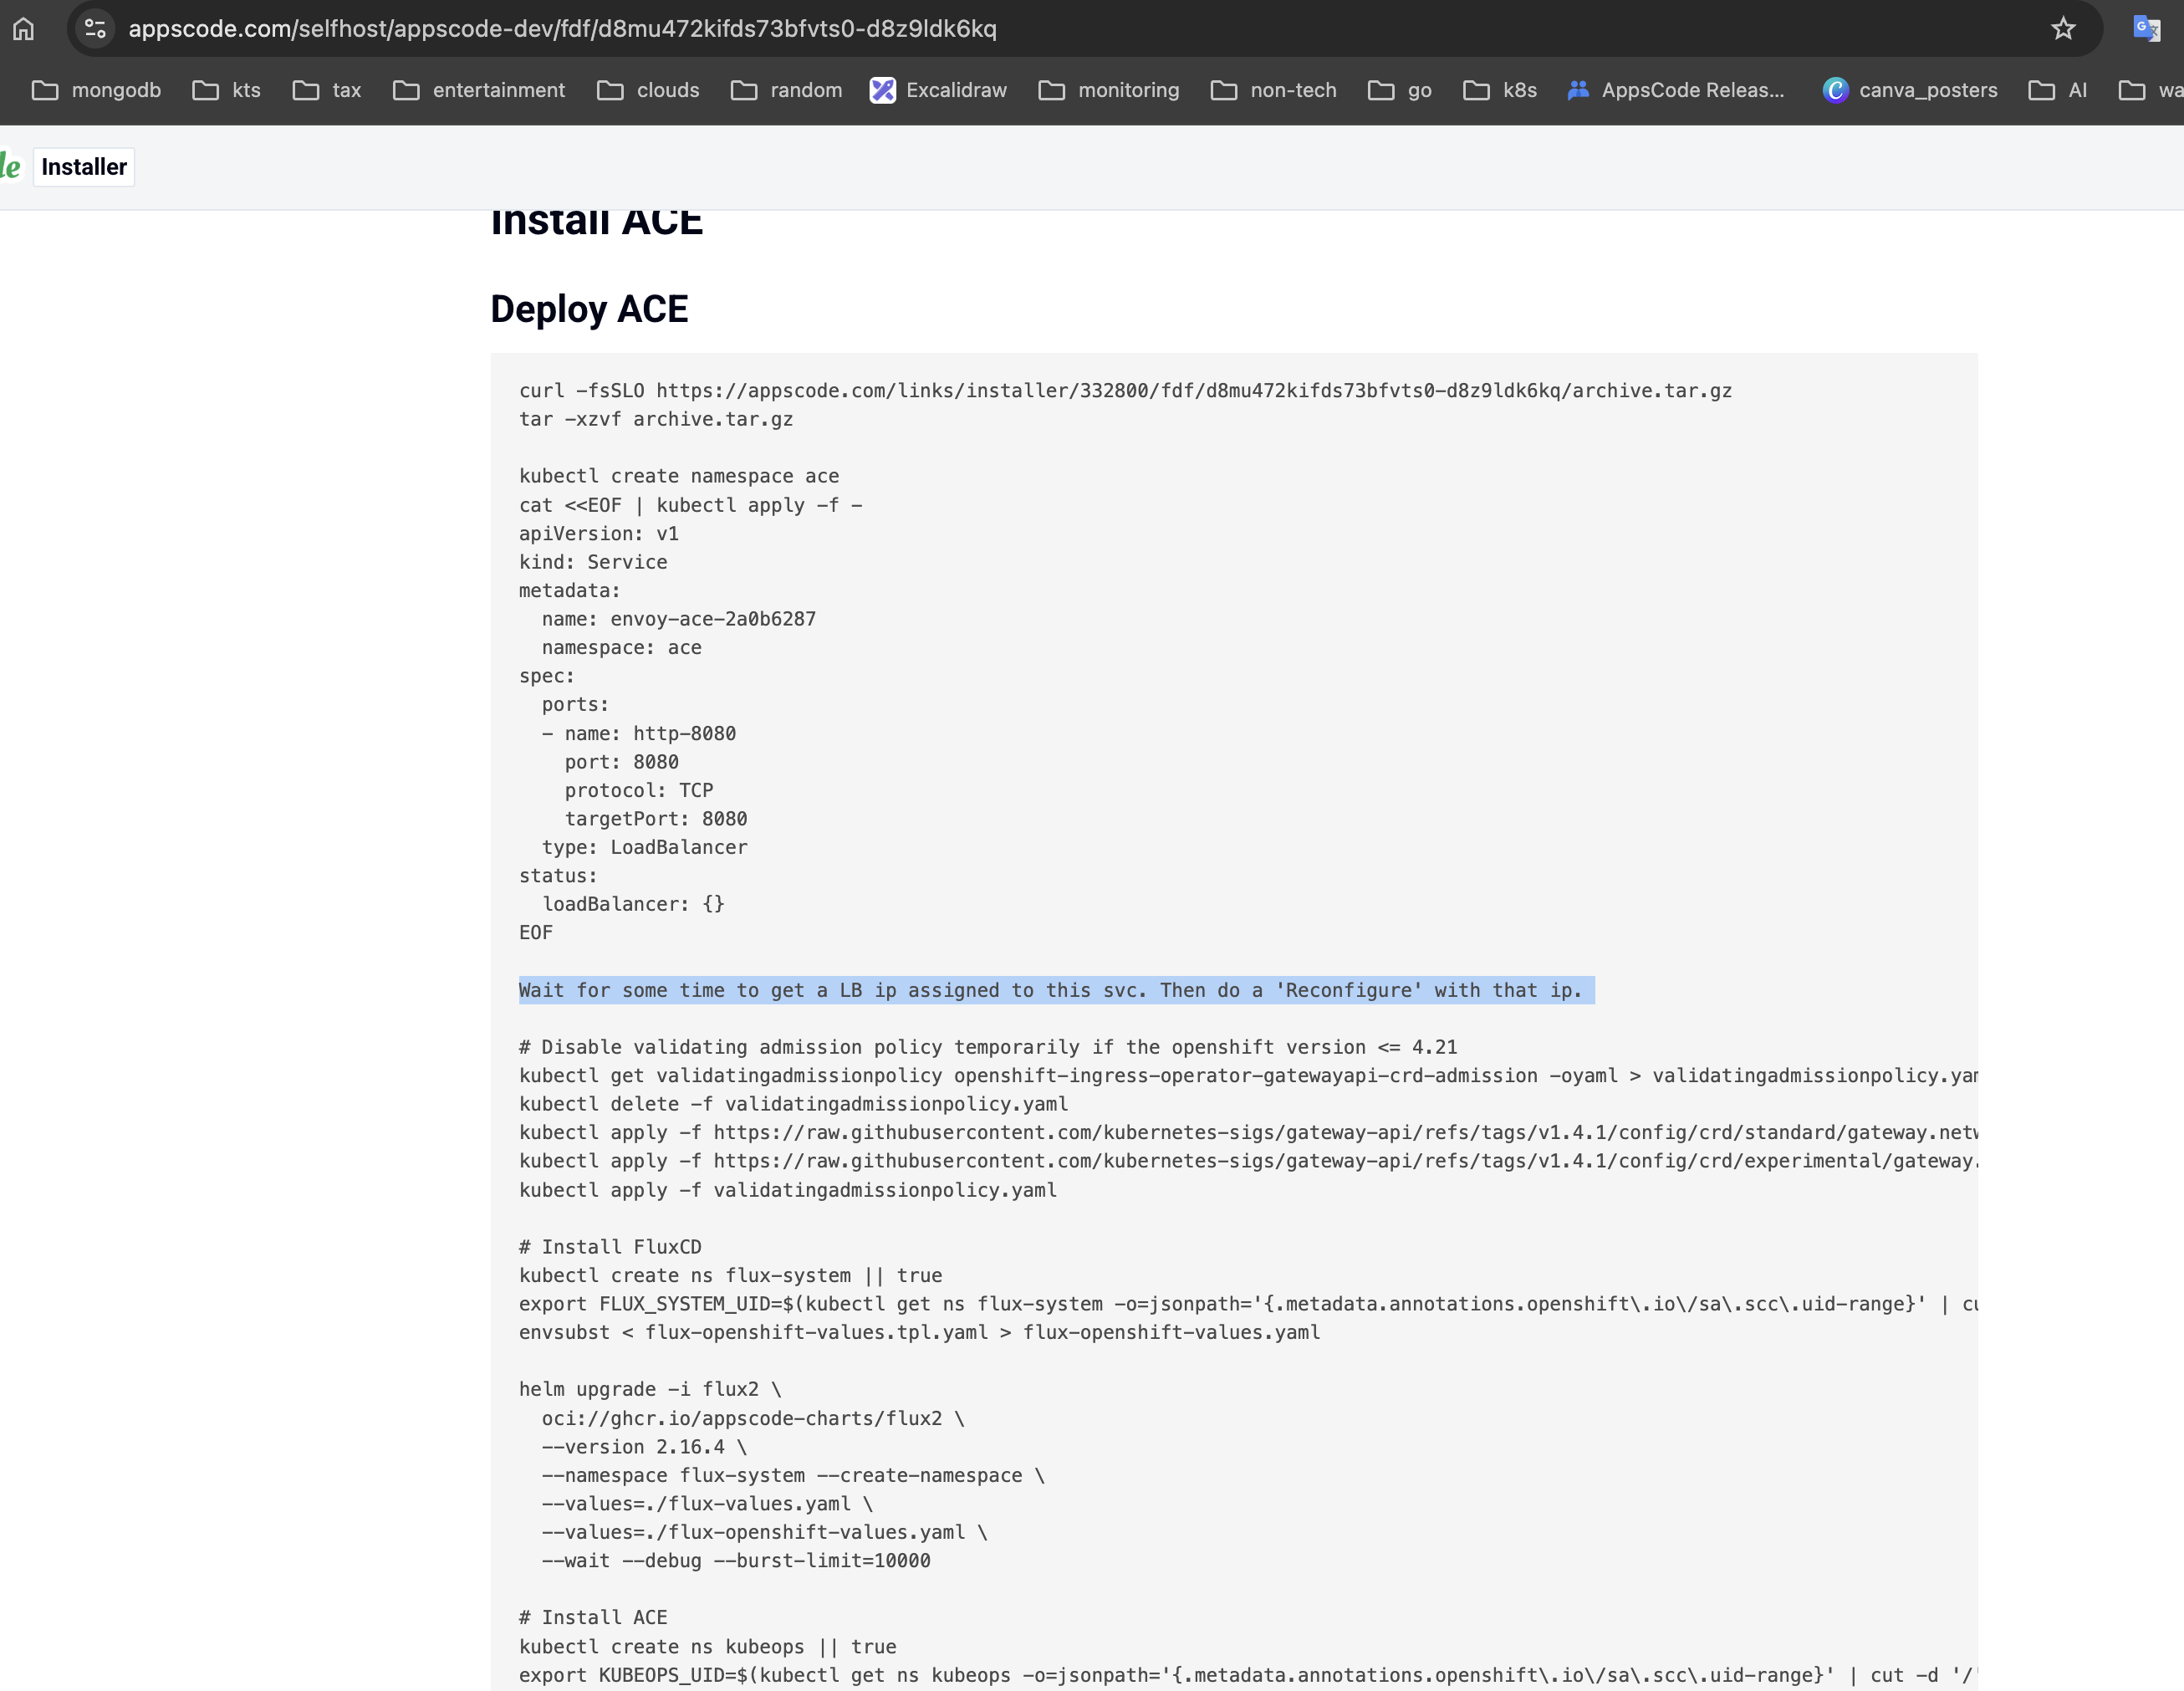
Follow the documentation provided by AppsCode to deploy the KubeDB Platform on your OpenShift cluster. For an OpenShift deployment the generated instructions are ordered specifically, and you must pause partway through to fix the placeholder Target IP:
- Create the LoadBalancer service. The first part of the generated instructions creates the platform’s LoadBalancer service in the
acenamespace. - Wait for the external IP. The LoadBalancer takes some time to get an external IP assigned. Run
kubectl get svc -n aceuntil theEXTERNAL-IPcolumn is populated, then copy that IP. - Reconfigure the installer. Update the Target IP with the assigned LoadBalancer IP and regenerate the installer. For DNS mode, also create or update the DNS
Arecord so your domain points to this IP. - Run the remaining install steps. Continue with the rest of the generated instructions (flux install,
helm upgrade, and the ACE install) using the reconfigured values.
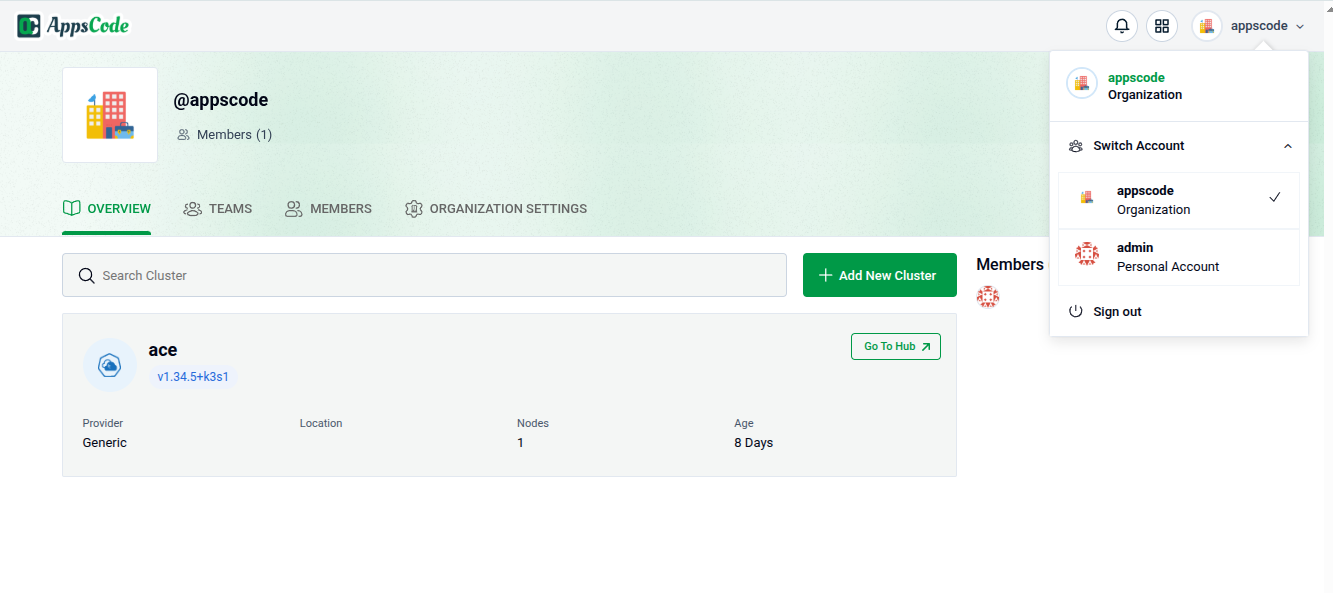
6. Explore the Deployed Platform
Once deployed, access the KubeDB Platform using the configured IP (IP mode) or domain (DNS mode). Log in with the admin account credentials provided during the creation process.
Notes
The Prometheus node-exporter DaemonSet will not run on an OpenShift cluster unless it runs in privileged mode. Since this is not our chart, you need to grant the required permission yourself:
oc adm policy add-scc-to-user privileged -z kube-prometheus-stack-prometheus-node-exporter -n monitoringWe also run the cert-manager
csi-driver-cacertsfeature in privileged mode so that it can add CA certificates to the OS trusted certificate store. You don’t need to do anything manually for this — it is handled automatically at the chart level.
Get Support
If you encounter any challenges during the deployment or have questions, reach out to AppsCode support for assistance.